In order to be able to pay an employee you will first have to create an employee record.
If you have already done so you can access the ‘Open and Pay’ screen by right clicking on the employee and choosing ‘Open and Pay’
Basic Pay Example
The first image below shows settings in ‘Employee’ > ‘Employee Maintenance’ > ‘Pay Rates’ section. The check box on the left hand side of this image represents whether the pay rate is salaried or not. In this example the ‘Hours per Annum’ is 2080, the rate per hour is £12, and it is not salaried.
We see how this calculation reflects in ‘Open and Pay’ in the second image. The yearly hours are divided into the month and the rate is multiplied by these hours to give the basic pay.
Note that fields such as Basic Pay, means calculations can be performed on entry, for example: when typing 100 + 30, 130 will displayed. If you type in 25* 10, 250 will be displayed

Hourly
In ‘Employee Maintenance > Pay Rates’ if you have:
- Un-ticked the ‘Salaried’ box on the pay-rate
- Specified a hours per week/annum
- Specified a rate per hour
Then these figures will appear in the ‘Basic Hours’ and ‘Rate’ boxes on the open and pay screen. You can adjust these figures in the ‘Basic Hours’ or ‘Rate’ fields if required.
Salaried
In ‘Employee Maintenance > Pay Rates’ if you have:
- Ticked the ‘Salaried‘ box
- Specified an annual amount of pay
Then the Basic Pay will be populated with the pay for that period. This basic pay is an adjustable figure.

‘Change’ Button:
If you need to pay any additional payments or any deductions from the employee then you can do so using the ‘Change’ button so that they would show separately on the payslip.
Clicking the ‘Change’ button opens a new screen entitled ‘Pay Period Additions & Deductions for (Surname),(Forename)’. This screen allows you to add in or edit any existing additions, deductions, check AEO (Attachment of Earnings Orders) deductions, record some absences (Sick Leave and Holiday Pay), check student loan deductions and amend/check pension deductions.
Any changes you make via the ‘Change’ button only apply to this particular payment, so they are temporary. Permanent additions and deductions are set-up through the ‘Employee’ > ‘Employee Maintenance’ screen.

Additions and Deductions:
These two fields will show any additions or deductions added in from the ‘Change’ menu or elsewhere.
With some deductions, like Pensions and Attachment of Earnings Orders, that are run on percentages, the figures may not show up in the ‘Additions’ and ‘Deductions’ boxes until after clicking the ‘Calculate’ button as until the calculation is performed it cannot work out the figure to show.
‘Restore’ Button:
Clicking the ‘Restore’ button will clear all additions and deductions and any changes you have made since entering the ‘Open and Pay Screen’ and revert back to the standard settings before you made any changes.
Tax:
The ‘Tax’ section of the Open and Pay Screen can change, depending on if the employee is weekly or monthly paid:


Tax Code:
This will show the current ‘Tax Code’ entered within ‘Employee’ > ‘Employee Maintenance’ > on the ‘Tax and Ni’ tab. If you type and change the tax code here then it will set and use this tax code going forward. If entering an invalid tax code a message will be displayed to inform you.
W1/M1 tick box:
This tick box refers to an employee’s ‘Tax Basis’ – so if the tax is calculated on a Week 1/Month 1 Basis or not (Cumulative Basis).A Week 1/Month 1 basis does not take account of any ‘Gross Pay to Date’ and ‘Tax Paid to Date’ within the tax calculation. This is normally applied when you have not received a P45 for a new employee, so that no previous employment details are known.
Payslip Date:
This will show the current payslip date for the week/month you are paying. The payslip date can be adjusted here manually but you can only have a payslip date within the current week/month you are paying. Any invalid dates will not be accepted. Changes to the date will not be made permanent. Payslip dates are set and accepted through ‘Company’ > ‘Company Maintenance’ > on the ‘Calendar’ tab. Notes on Company Maintenance and Calendar tab can be found under the ‘Company’ section of this manual.
Pay at Week/Tax at Week/Pay Weeks and Tax at Month
If paying a weekly employee for 3 weeks, say just before Christmas, the ‘Pay at Week’ should be 35, the ‘Tax at Week’ should be 35 and the ‘Pay Weeks’should be 3. The pay weeks will multiple up additions/deductions with the ‘Hol’ tick box ticked.
- Pay at Week: Shows the current week you are paying the employee.
- Tax and Week: This will be the week you are taxing the employee.
- Pay Weeks: The number of weeks you are paying the employee. Pay weeks is determined by the employees ‘Pay Frequency’– for example, if an employee is weekly paid then the ‘Pay Weeks’ box will default to 1, if they are two weekly paid it would default as 2 and 4 for Four Weekly.
- Tax at Month: This will show you the current month you are paying a monthly paid employee.
With the Pay at Week, Tax at Week and Tax at Month boxes, you can change these to advance the weeks/months but you cannot move them backwards.
National Insurance
NIC Code:
This list displays the current NIC Code for the employee held under ‘Employee’ > ‘Employee Maintenance’ > under the ‘Tax and NI’ tab. The code can be changed through the Employee Maintenance screens.
‘Director’ tick box and the ‘Start Date’:
If the employee is a director there will be a tick in the ‘Director?’ tick box. To make an employee a director and set the director start date, you must use the ‘Employee’ > ‘Employee Maintenance’ > ‘Personal’ tab.
‘NIC Refund’ Button:
It is possible to refund NIC should an incorrect code have been used in previous calculations. The refund amount will be reflected on the P32 Report (found under ‘Reports’ > ‘Pay Period’ > ‘HMRC Remittance Advice’ > ‘P32 Report’).
‘B/F NIC’:
Clicking the ‘B/F NIC’ button will allow you to view the year to date NIC figures for the employee.
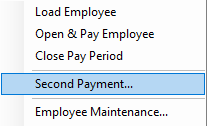
Second Payments
You can access this option by selecting the employees name from the employee list on the left of the home-screen and then ‘Employee’ > ‘Second Payment’.
The ‘Second Payment’ feature allows you to run another payment for an employee in a pay period that you have already paid. After running a second payment for an employee, the payslip for that period will show the second payment independently or any basic pay amounts and work out the Tax and NI accordingly.

B/F Pay and Tax
The B/F Pay and Tax section will show entered P45/P6 details entered for the employee under ‘Employee’ > ‘Employee Maintenance’ on the ‘Tax and NI’ tab.
These details cannot be entered or altered here, but can be changed through the Employee Maintenance screen. When an employee joins the company and provides a P45, then you would put these details into ‘Employee Maintenance’ on the ‘Tax and NI’ tab. Then when you ‘Open and Pay’the employee, the software will use the P45 details to calculate the employees pay. As an example, if I received a P45 from an employee with a ‘Total Pay to Date’ of £2000 and ‘Total Tax to Date’ of £250 then when open and paying the employee the ‘Taxable Gross’ would show as ‘2000.00’ and the ‘Tax Paid’ would show as ‘250.00’.

Tax Paid this Employment
The ‘This Employment’ section will show any entered ‘Brought Forward Information’ or any previous pay paid to them in this employee in the current tax year.
These figures are accrued over the year and can only be altered by reprocessing the employee’s pay or when starting a new employee and entering brought forward figures for them. As an example, if I paid an employee £2000 for month 1 and they paid £250 in tax then the ‘Taxable Gross’ would show as ‘2000.00’ and the ‘Tax Paid’ would show as ‘250.00’.

A little bit about us...
Qtac, a recognised payroll solutions provider in the UK, has been serving businesses for 30 years. Specializing in both payroll software and outsourced payroll services, Qtac caters to small businesses, large corporations, and payroll bureaux. Our software, recognised by HMRC, streamlines the payroll process, featuring RTI submissions, workplace pensions management, and a cloud-based portal for payslips and employee self-service. This software is supported by top-tier customer assistance, ensuring a smooth payroll experience.
Additionally, Qtac offers tailored ‘white-labelled’ outsourcing services. These services are particularly attractive to accountancy firms, as they save time, reduce stress, and mitigate payroll-related risks. By outsourcing to Qtac, companies can be confident in the knowledge that their payroll needs are being expertly managed.
Qtac's solutions are not just about functionality; they are about building long-lasting relationships with clients, offering them a combination of technology and expertise. Their commitment to adapting to client needs and providing reliable, efficient services has established Qtac as a trusted name in the payroll solutions sector in the UK. In essence, Qtac simplifies and enhances the payroll process for a diverse range of clients, ensuring compliance, efficiency, and customer satisfaction.
Need some help?
Contact SupportOur team are here to help...
|
|

